Now that we've gotten your MLS approval, you're received the Getting Started with Showcase IDX email (as outlined here), you're ready to install the Showcase IDX plugin! Showcase IDX is so easy to install! Your IDX should be up and running in less than 5 minutes, if you follow our step-by-step guide below. Please be sure to complete the instructions within each step carefully.
Video Tutorial
We also have a video tutorial to assist in your installation!
Written Instructions
-
- Login to your WordPress dashboard
- Hover over "Plugins" in the left sidebar and click "Add New" (Plugins is typically found beneath the Appearance option as shown below)
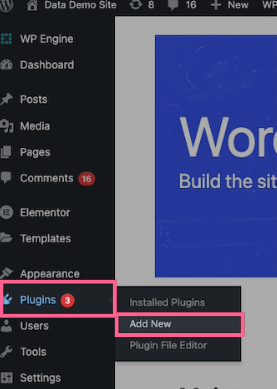
3. Search for "Showcase IDX" in the keyword search box on the right

4. Click "Install" when you locate Showcase IDX and then click "Activate" when the button changes
- Login to your WordPress dashboard
-
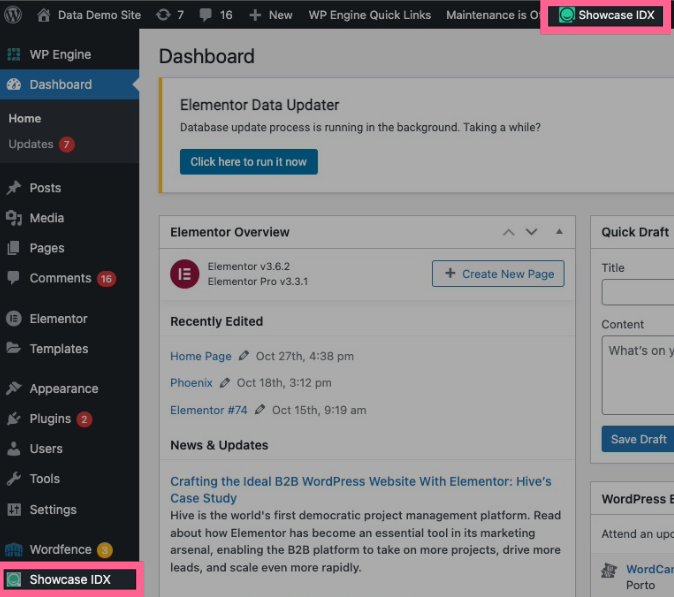
1. Click "Showcase IDX" in the sidebar of WordPress (it may appear closer to the bottom of the sidebar, depending on how many plugins you have installed) or in the top bar navigation
2. The following page will ask if you are an existing member or prompt you to sign up for a free trial. You should have already received your Getting Started email, so under 'Existing Member Login' click "Sign In
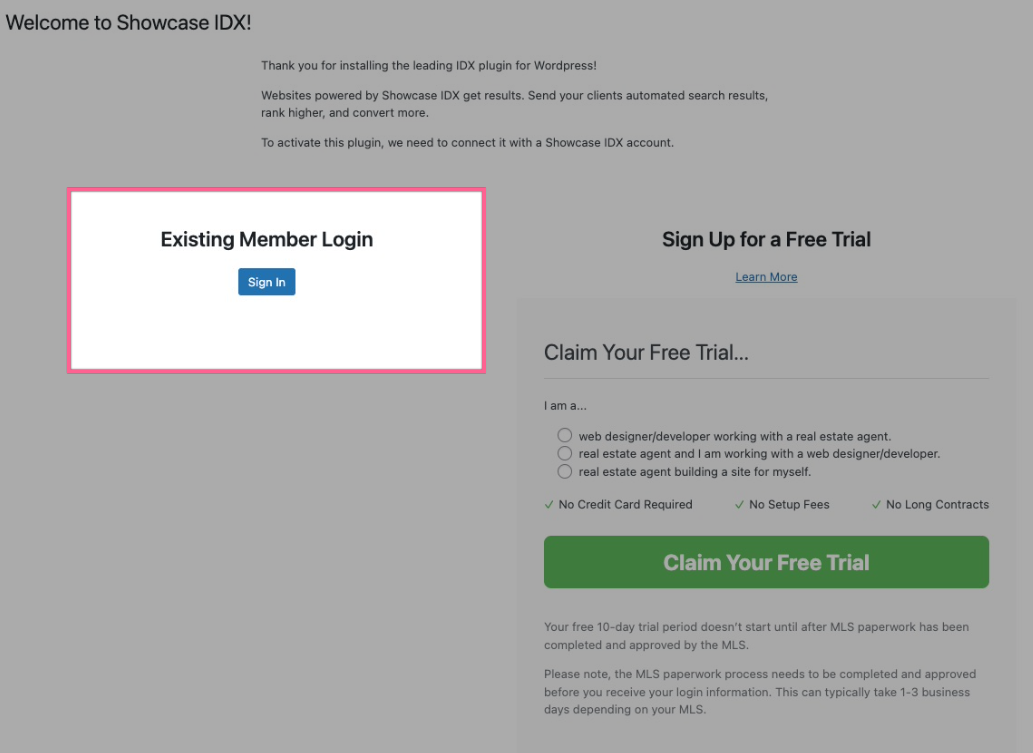
3. Log into your Showcase IDX account using the credentials from your Getting Started email

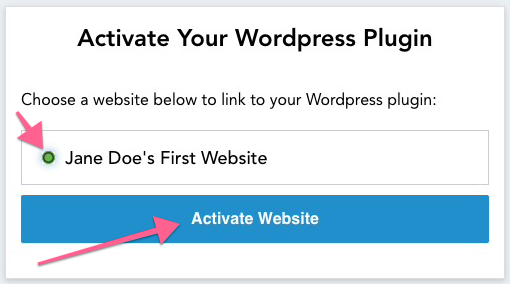
4. Select "[Name]'s First Website," which should be the only option (you can change the Site Title later, when configuring your General Settings). Click "Activate Website"
-
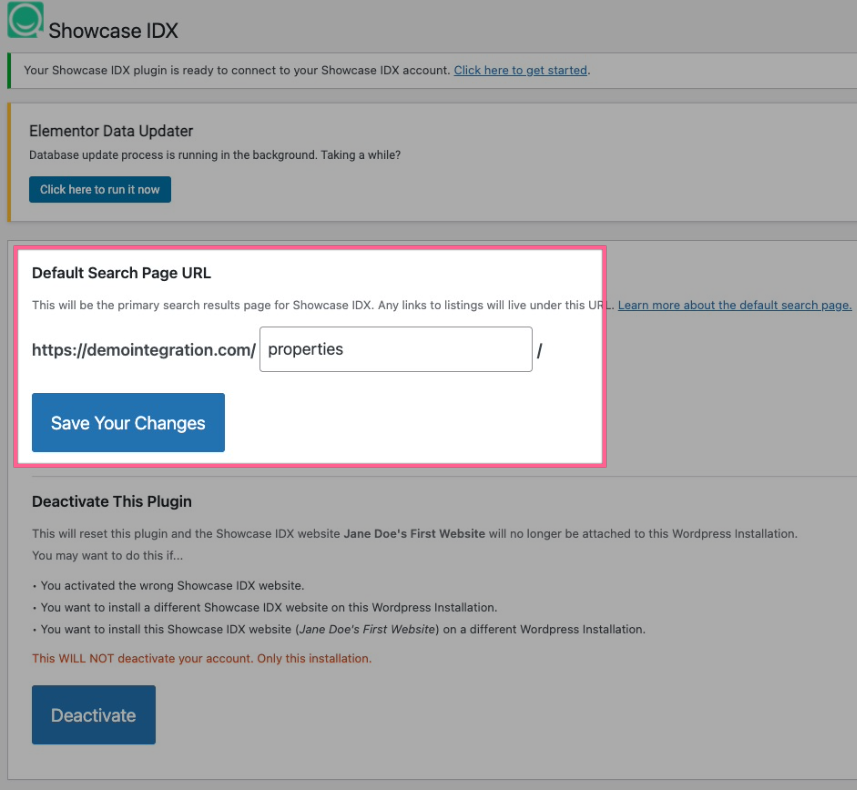
Once installed, you will then proceed to update your Default Search Page URL.
1. The default slug is "/properties/". You can change this to whatever you'd like- just remember what you change it to for the next steps. Click "Save Changes" if you've updated the slug. Otherwise, if you are happy with /properties/, move on to the next step
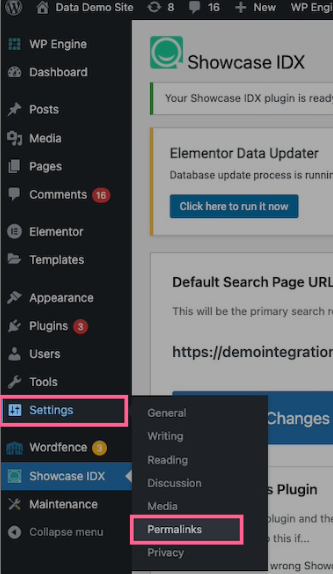
2. In the left sidebar, hover over "Settings" and click "Permalinks"
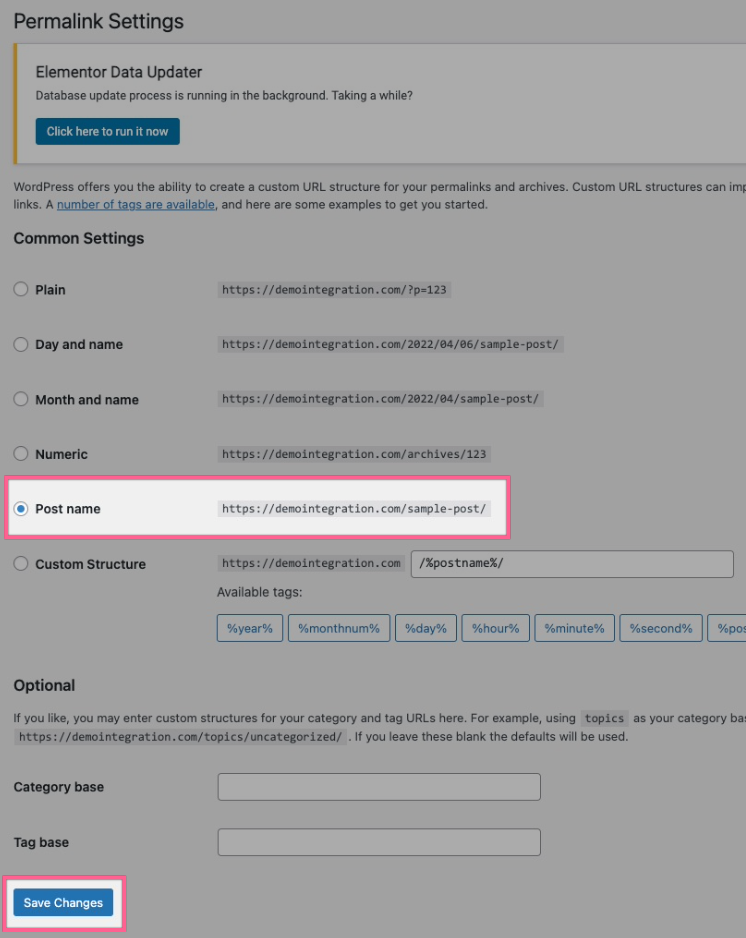
3. If your Permalink is not set to "Post Name", choose Post Name. Click "Save Changes"
-
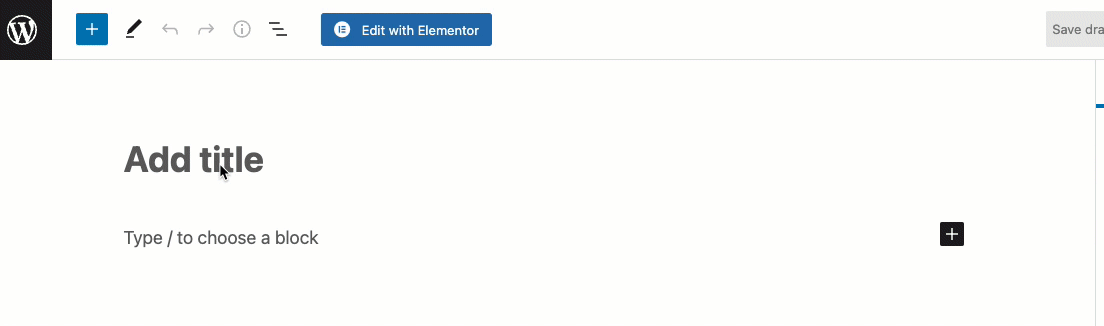
1. Hover over "Pages" in the left sidebar and click "Add New"
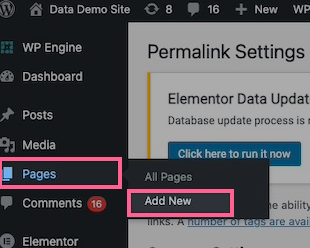
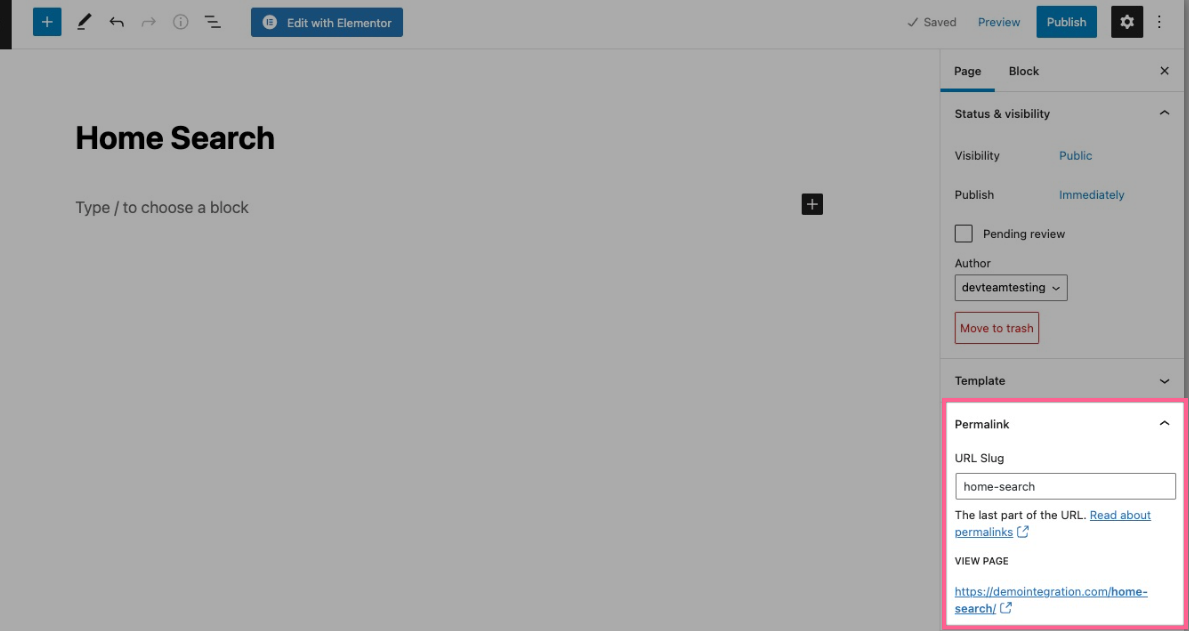
2. Title your new page to match your slug. For example, if your slug is /properties/, title your page "Properties". If your slug is /home-search/, title your page "Home Search".
When creating a new page, the title usually sets the URL but you can always change the permalink slug later on the right hand of the screen.
Please be aware that this default search page cannot be a PARENT PAGE for any hotsheet pages. The shortcodes for hotsheets will not work if you use this page as your parent page.
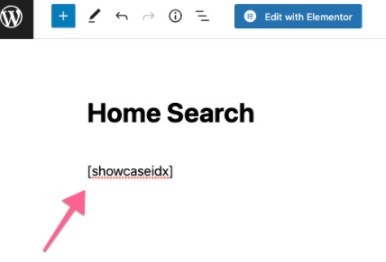
3. Somewhere in the body of the page, add this shortcode as a text module- [showcaseidx] – This should be the only shortcode on this page
Tip
When building your page using the default Gutenberg website builder, or a different theme builder (e.g Divi or Elementor), text elements tend to work better. However, if your theme builder doesn't like the shortcode in a text element (it throws an error, or doesn't display correctly), try a code element instead. This goes for any of the Showcase IDX shortcodes.
4. Update the page to save your changes
-
We do suggest that you add a Search menu option to your website's main menu navigation to give your clients an easy way to access your main search page. This process will vary depending on how you have your website set up (theme, site builder, etc).
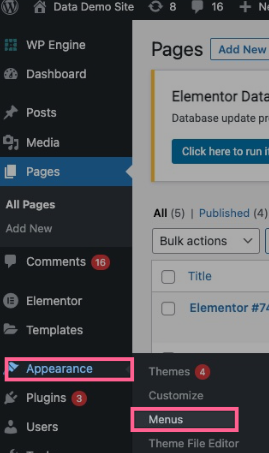
1. Hover over "Appearance" and click "Menus"
2. Select the page from your recent pages menu and click "Add to Menu"

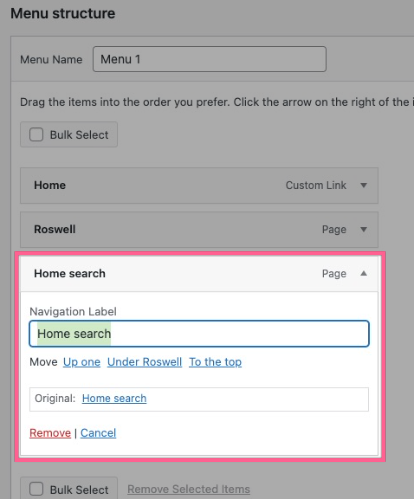
3. Your new menu item lives under the "Menu structure" page to the left. If you would like to change the navigation label of your menu option, click on the toggle to open the menu item settings and update as necessary and click "Save Menu"
If you followed each step of the installation instructions above, your main search is setup is complete! From here, it's a matter of adding widgets around your website, like a search widget on your homepage! You can find all our widgets here under Settings > Shortcodes.